Easy used furniture DIY: dressers
For today’s used furniture DIY I’ve got some quick and easy tips on how to update a dresser from shabby to shabby chic. Drag out that old dresser you’ve been avoiding looking too closely at or if you’re in need of one, take a peek in the household section of your local Used.ca site there are a ton of great cheap and free finds.
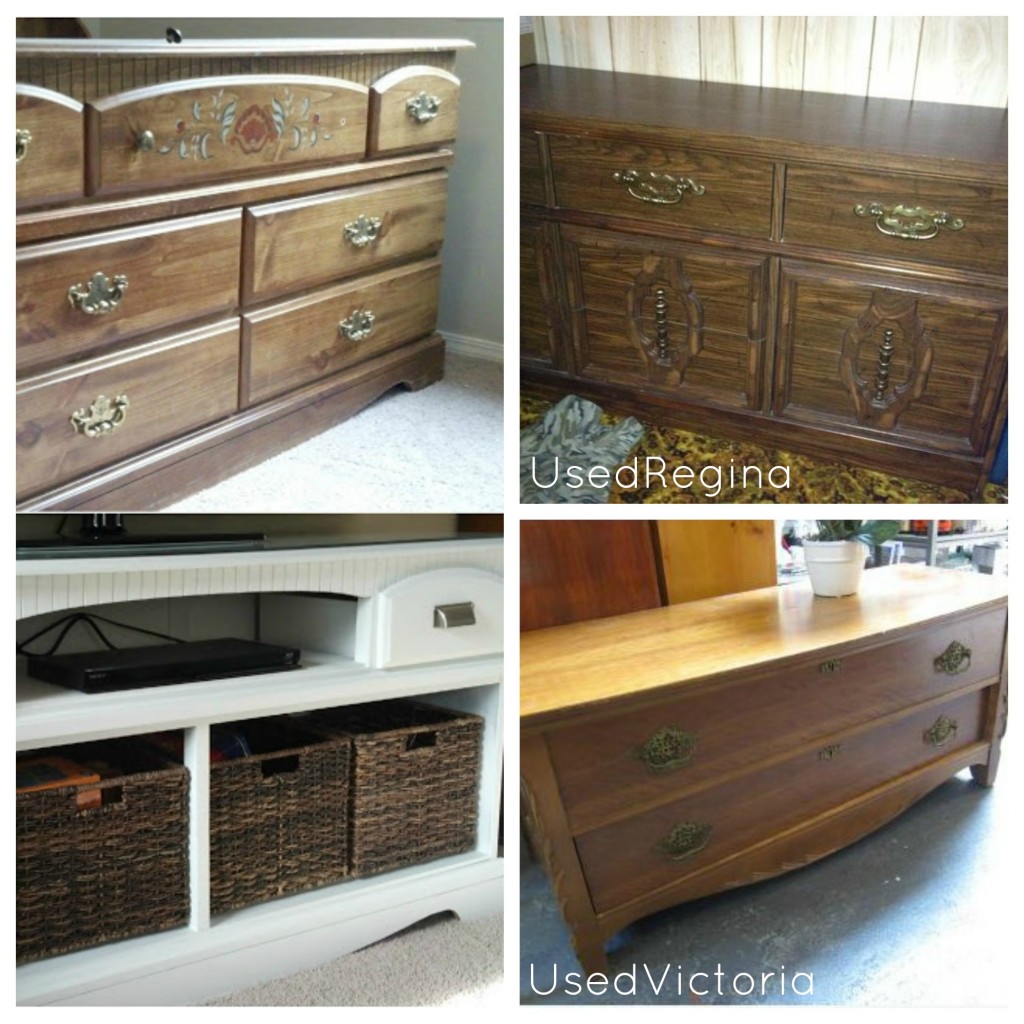
Dresser to TV stand: As you can see, the Used finds are on the right, from UsedVictoria.com and UsedRegina.com. The pictures shown on the left are from a DIY by At the Park’s. As shown, you can turn a really old dresser into a beautiful TV stand with plenty of storage and its not that hard (though a little time consuming). A brief how to:
- Remove drawers and support beams, cut and paint a long board to go into the bottom of the dresser
- Sand, prime and paint
- Remove old handles and replace
More detailed instructions here. And voilà! In three steps you have a completely transformed dresser.
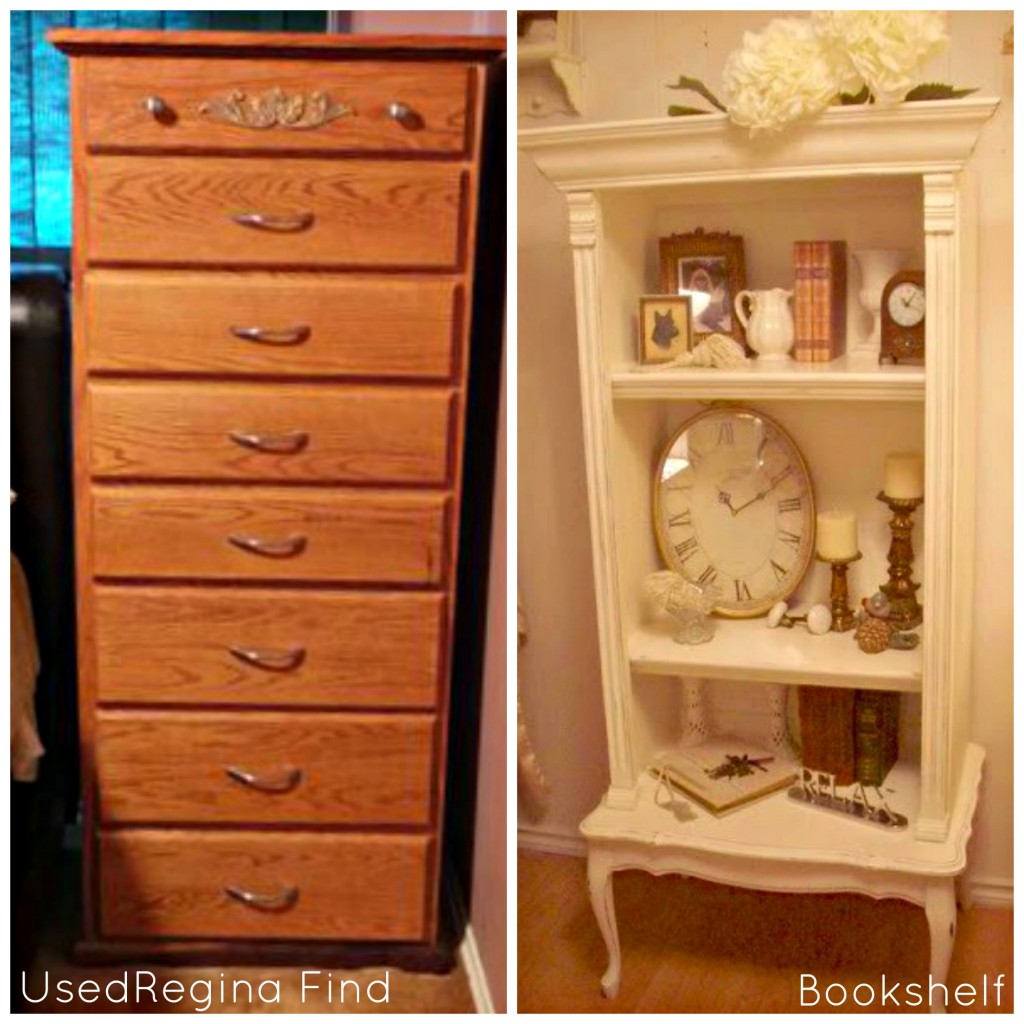
Bookshelf: Tall, upright dressers can be turned into a beautiful bookshelf or display cabinet. Though, quick note for this one, you will also need a small side table or coffee table. This tutorial is from 4 the Love of Wood.
First, remove the drawers and cut down the dresser to the height that you prefer. Second, use the removed sides of the dresser to create the shelves you want within the dresser. Note: as you go, sand, paint and prime as you desire. Cut off the length and depth to match the style of your home. Detailing at the top and sides can be bought from a UsedEverwhere.com site, your local home store or re-used from an old picture frame.
Another option, where you actually take apart the whole dresser, is here.
Bathroom vanity:
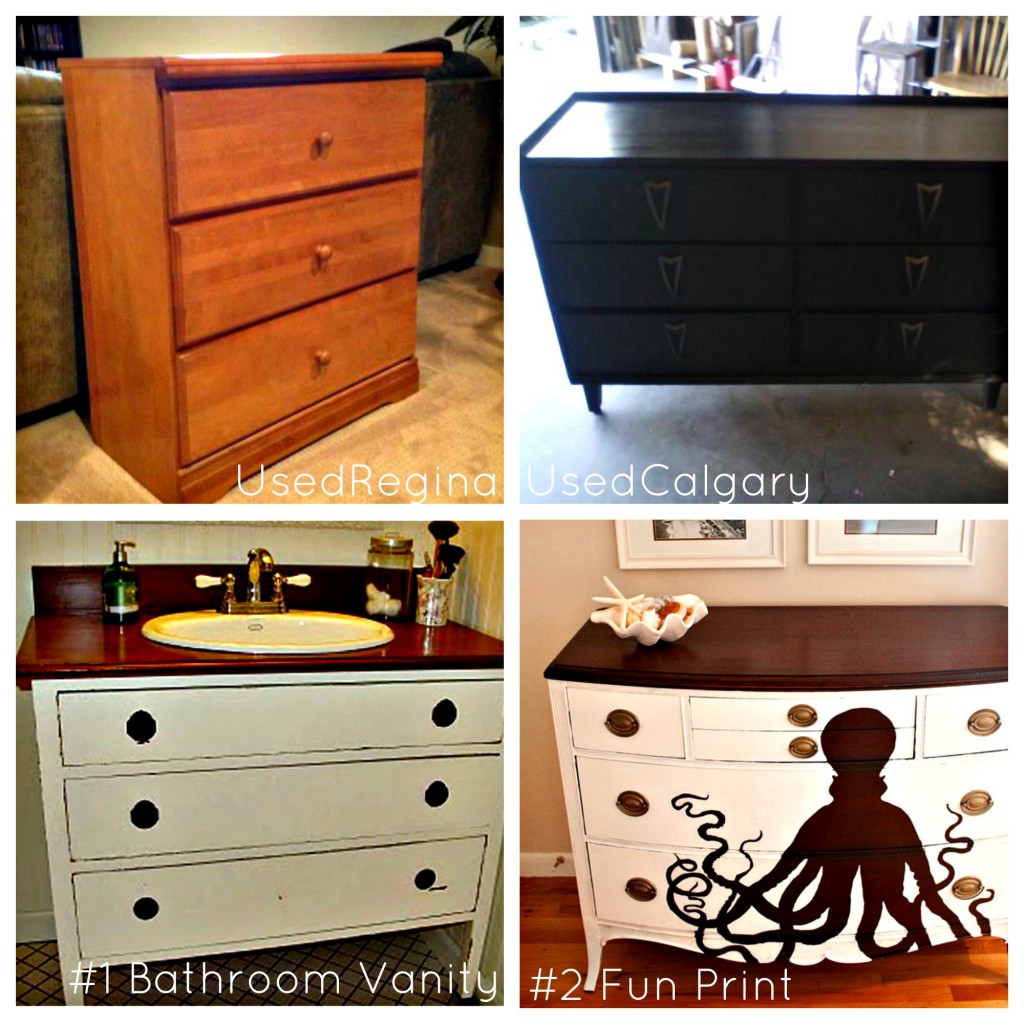
This bathroom vanity has a gorgeous rustic style and is not too hard to spruce up from a standard dresser. Begin with measuring your space – bathrooms are often small and you need to be sure that a dresser will fit. Then, make sure the top of the dresser is large enough to be able to hold a sink. You will need to create room for the sink within the drawers, but there will still be storage space available on the sides and as you go farther down. One important thing to remember is to make sure the wood in the dresser is heavily sealed to avoid water damage. Use clear caulk around the sink once installed. And, you can add paint and new handles to match the theme of the bathroom. Full tutorial from Remodelaholic. Another option is to go for a more modern look with dark wood (or glaze) and modern sink and knobs (perhaps a silver tone). Sleek.
Fun print:
I think this octopus print is awesome and you can even combine it with option #1 so that it becomes an incredible ocean themed bathroom piece. This tutorial is surprisingly easy – all it requires are some basic painting skills. DIY from Jelly Pin.
All you need is a projector, a print you like, paint and paint brushes. Set up the projector and project the print onto the dresser. Move/adjust the projector so that the image is the size you would like. Then, paint around the edges of the image and the rest of the dresser with the colour of your choice and you’re left with the outline of your choice. Simple. And gorgeous.
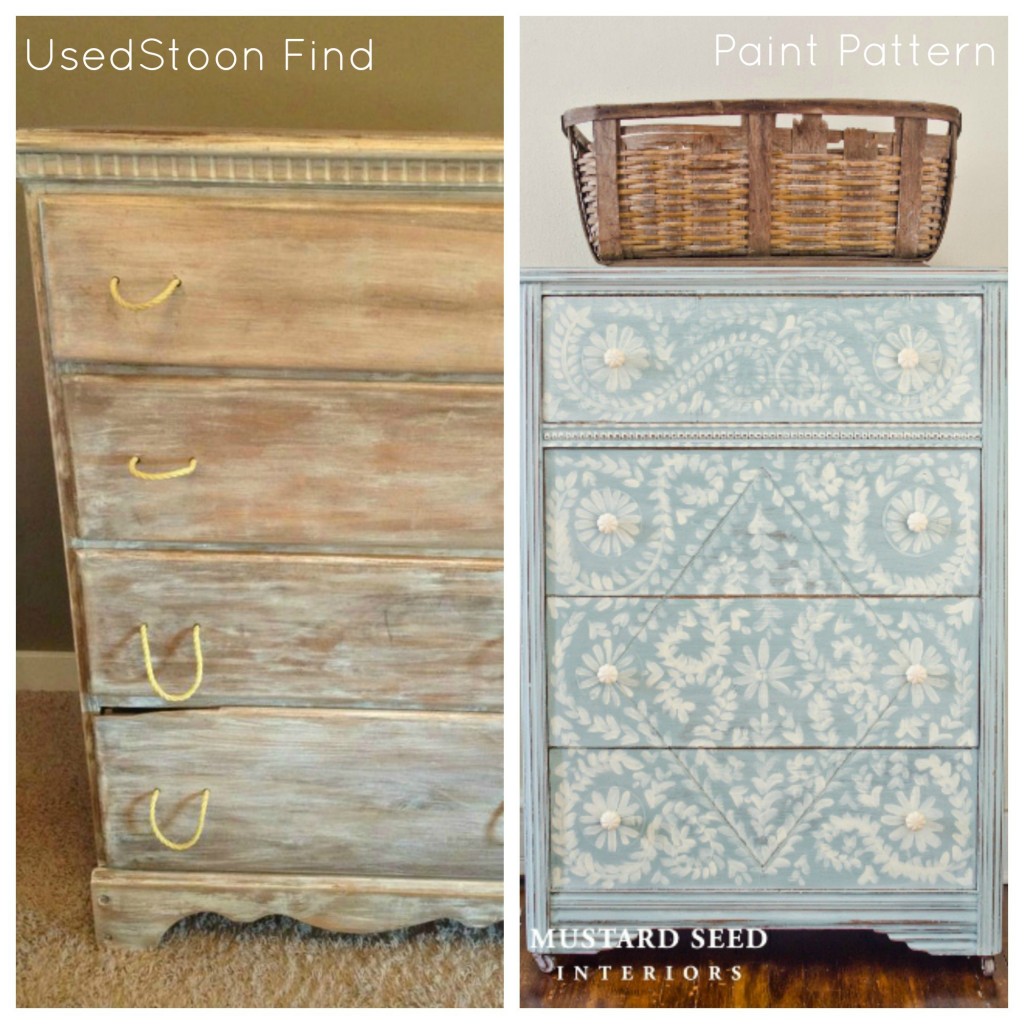
This dresser might possibly be one of the most beautiful dressers I have ever seen. Hand painted by Miss Mustard Seed, this dresser is both eye catching but also blends seamlessly into the room due to the pastel tones. Unlike the last octopus one this one may require a little artistic skill. A little. To begin with, the base coat. Slap on some milk paint to achieve similar results, and then decide on your desired pattern. Maybe sketch it out first. Pick a paint colour, then get going. From this finished picture, I think a simple technique of tiny swipes outwards will do the trick, with longer swipes for the flowers. The UsedStoon.com find is similar to the picture, though one difference would be the handles, if you had a dresser similar you would need a handle, not a single knob. Then you’re done! And you now have the perfect piece for your bedroom. Also you can throw a sweet basket on top for the final touch. And a little extra storage.
And that’s that! Those are my favourite dresser revamps, what are yours? Have you done any similar projects? Let me know!
Useful links


 Work smart. Not hard.


Sarah Tremblay
I loved what you did with the dressers. The dressers looks amazing and will fit in any space easily.