A DIY woodshop: the six tools you need
The Scene: our house. A weekend.
I turn to Dave and say, apropos of nothing much said, “I think I should write a post about tools: about how to choose the key tools you need to be able to build furniture. The Top Five Tools! I mean, we’re trying to get the shed set up so we can build the furniture we want…lots of other people would probably like to be able to do that too!”
To Dave’s credit, he really only sputters a little. Then one eyebrow raises, archly.
“We’re doing it?”
Ahem.
Fair enough. I, for the record, use a hammer real good. Except when I hit my thumb. I can also use a drill without causing anyone imminent danger. Beyond that, I really don’t know a table saw from a jigsaw and have a healthy fear of both.
If we were really reliant on my furniture-building skills to finish decking out this half-empty house, we’d be sitting on milkcrates well into retirement.
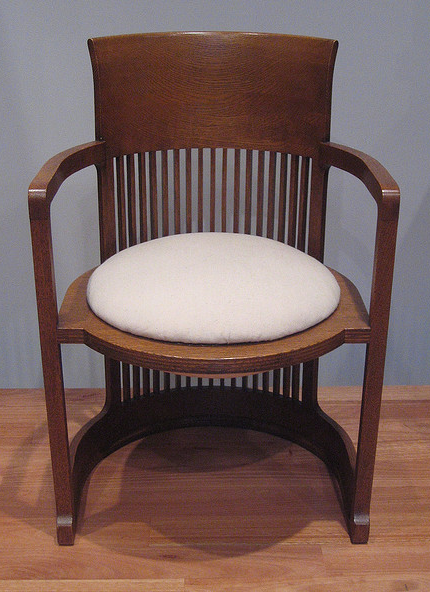
I don’t want to sit on milkcrates. I want to sit on these kinda babies and their Frank Lloyd Wright-designed brethren.
 Photo courtesy of http://www.flickr.com/photos/designministry/83699766/
So I try again. In the interest of not taking false ownership of tools, skills, research, or sourcing my hands have actually had no part in, I hand the entire laptop over to Dave.
“Fearless Home Furniture Maker,” I said, “What are the Top Five Tools a person needs to get started in his or her own woodshop?”
End Scene.
(Note: in the wisdom handed back, there are six Top Five tools. Somebody doesn’t like having structure imposed on him anymore than he likes my misuse of the word “we.”
*The Top Five Six Tools You Need for an Effective Home Woodshop*
– by Dave Cormier, NOT Bonnie Stewart
I’m not what you would call a carpenter. That is, unless you have a very broad minded feeling about the word. I do like to build things in wood, and have been working my way up to furniture by doing a few new projects every year for the last few. My dad gave me a hand-me-down mitre saw five years ago, when he bought himself a new one. I started with a picture frame, and built some steps for our old house.
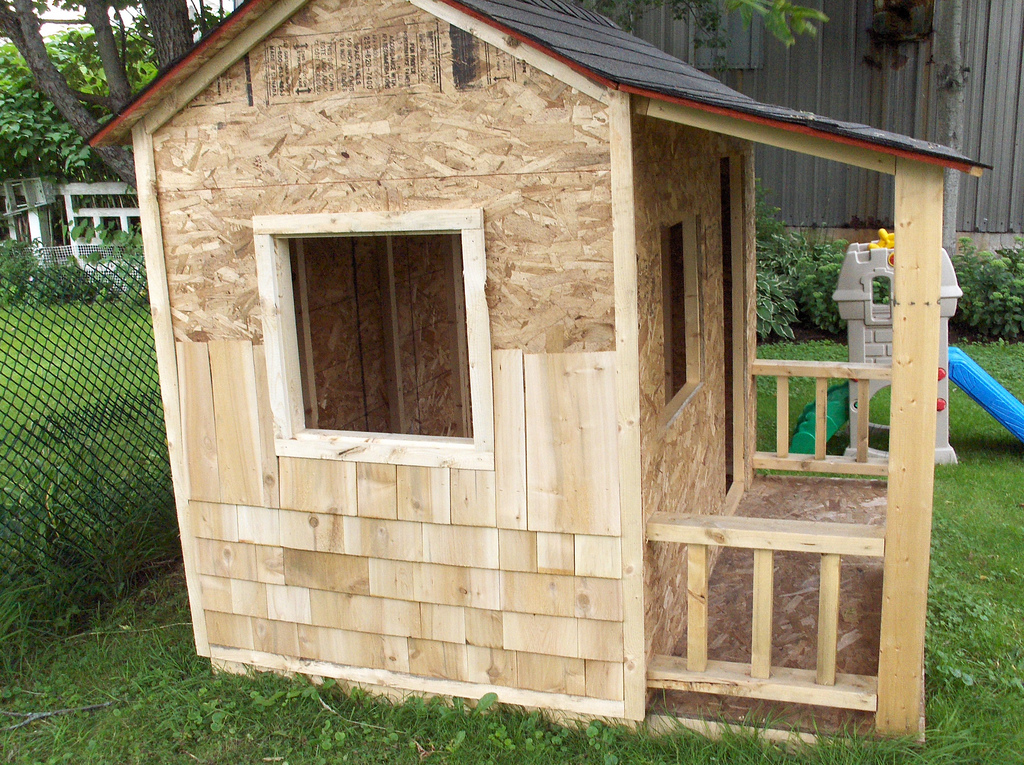
Then a playhouse, for our kids. Still practical stuff, mostly. Built of particleboard, fir, and cedar, without a lot of fancy detailing.
When we started talking about moving into the new house, though, I had certain feelings about the furniture that would go into it. I wanted it to be furnished with things that were solid, that would last, that wouldn’t get thrown in the dump five years from now and replaced by other things equally flimsy and disposable.
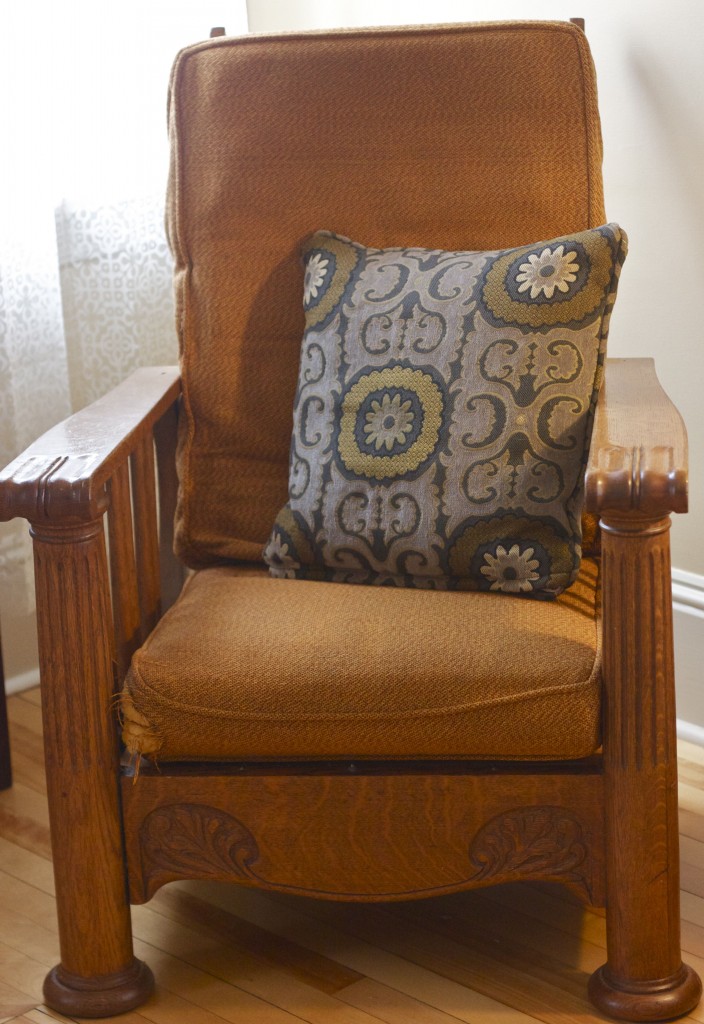
Bon found this chair on UsedPEI a few weeks back: while not exactly what I’m hoping to make, it sort of exemplifies what I’m going for. Here it is, long after its maker probably ever intended, about to be recovered and given a place of honour in the house.
It’s made of quartersawn oak, the wood of choice for Arts and Crafts furniture. It is the drunken uncle to the furniture that I hope to build, not ‘quite’ in the style that it seems that it is supposed to be. But it’s made of the right stuff, it’s sturdy, and, most important of all, it’s terribly comfortable.
So with this new dedication to making ‘real’ furniture, I am realizing that some of the tools that I have are not sturdy enough to deal with the harder wood and the lower margin of error. A margin of error, I should add, that includes the extra special margin that comes from my general level of incompetence. That’s two errors. One error too many. So I’m upgrading. Step by step, I’m making myself a real, semi-serious, woodshop.
I’ve spent months wandering through discussion forums and trying to figure out the absolute basics I need to get started. Without further adieu, the five (okay, six) basic tools I need in order to build cool furniture:
1. The table saw
The table saw is the heart of any woodshop. It allows you to make the big cuts, straight. Straight seems to be the magic word in woodworking. I’m saving up for a cabinet saw.
2. The jointer
This is a funny little tool. All it seems designed to do is make a board straight. Seems simple enough right? Don’t they come straight when you get them? Well… that depends. It seems all the cool people get wood unfinished from the lumber store. It costs a lot less and gives you a bit more control. The big choice in jointers seems to be 6” or 8”. The smaller one is much cheaper and will fit into my little shop. The 8 inch, however, allows you to make the edge of a board straight, but also the flat of it as well. If I had the space…
3. The planer
The planer is a simple tool. Also called a ‘thickness planer,’ it allows you to get your board to the needed, uh, thickness. Simple, but absolutely necessary as – see above – not all boards are actually created equal.
4. The mitre saw
This makes very precise cuts across a board. I actually have one of these already, which is handy. It’s a ‘compound sliding mitre saw’, which essentially means that i can cut across a 10” board and do it on an angle. That’s cool.
5. The band saw
This saw is critical for any curved cuts you might want to make. Need to make a rounded swirl or a curvy bit? The band saw is perfect. It can also be useful if you’re trying to split a large board in half.
…And one extra tool, for good measure:
6. The mortiser
This is only necessary if you’re interested in making Arts & Crafts furniture, like I am. But that stuff is gorgeous, and my life is going to be alot easier with one of these. Essentially it makes square holes for the pegs that join most Arts& Crafts pieces together. It’s a signature design element in that kind of furniture, and makes what you build solid as a rock. Sounds easy enough…but it’s a lot more complicated than it sounds unless you have one of these little beauties.
When looking for tools, I try to follow my father’s rule of thumb: buy it once. In other words, the cheapest version may not be your wisest investment.
But neither do you need to spend a fortune. In this age of irons and microwaves that only last a year, it seems that many of the tools created for woodworking are still made of sturdy stuff. In my research for the woodshop, I’ve come across any number of tools that seem to suggest they weigh over 500lbs. While delivery might make sense if you’re breaking out these big guns, the truth is, the majority of the tools on my list can be found gently used and still in excellent shape: check your local listings.
Basically: take your time gathering your woodshop necessities. Do your research, know what you want to build, and be careful to keep your fingers when learning! If you’re patient and lucky, you may be able to build a lifetime of tools and skills and great furniture for less than the investment in one single signature pre-built piece.


 Work smart. Not hard.


Theresa Cormier
Very good information about tools, now you have to give us some information on sanding and staining…
John Schinker
I think I see a pattern here. Not only does she come up with the ideas of the furniture and outsource their actual construction, but she also outsources the writing of the blog post about them. Great teamwork, there!
Regarding the tools, you can get a lot done with that list. Depending on the types of things you’re making, you may find a router table pretty handy for those beveled edges and rounded corners and raised panels. And, of course, if you want anything round, you’ll need a lathe. For anything wide, like a table top, a biscuit jointer will be very helpful, especially with the jointer and planer already in the mix.
But there are some smaller necessities as well. You can’t do much of anything without good clamps, for example. And you’re probably going to need a stacked dado cutter to make the tenons to fit into those mortises. And, as Theresa points out, there’s a lot of sanding to be done.
When I learned to play the guitar, I started with basic chords: C, D, G, A. Then, I added a few slightly more complicated ones: Am, Em, D7. It was years before I got the complicated ones down, the F major, B minor, G minor. That doesn’t mean I wasn’t playing songs and enjoying the process in the meantime. It’s just that it’s a very deep pool.
The same is true for brewing. I didn’t start out with a 30 liter brew pot, 64 quart mash tun, and 7-keg draught system. But I could still make pretty decent beer with the basics. Enjoy the new hobby, and add to your collection of tools as the need arises.
Bonnie Stewart
Theresa, I think I’ll ask YOU to write that piece….!
Jordan Wilson
Good work. Author did a fantastic job for this blog.
Each and Every tool is listed and explained.
I came to know about some tools in the list I never heard,
i.e. The Planer, The Mortiser, etc.
So all thanks to author and I really appreciate his work.
Mike Biro
2 Things missing from that list any true woodshop couldn’t live without…
#1 Router
These are great for alot of different uses from making decorative moldings for making picture frames to creating tongue and grooves for hardwood flooring and with the vast array of bits you can get for them they are very handy to have in the workshop. A router table is also a great investment because you can fine tune exactly how much material is taken off.
#2 Biscuit Jointer
These are great for joining 2 pieces of wood together along the side to increase the width of the overall plank. Where this comes in very handy is if you wanted to make a table perhaps. Though it is possible to find a solid (non plywood) plank for a table top they are not cheap at all. So putting say 4 or 5 narrower (cheaper planks) together is the route you must take.