Antiquing an antique: DIY tutorial with foil
Do you ever find yourself standing at a certain Swedish furniture store, staring at a cool coffee or end table, thinking, I want it because it’s a little different, but it’s made of wood chips and seems overpriced? You may be a good candidate for DIY furniture projects! It can be so much easier to find a unique and special piece when you make it for yourself; when you find yourself looking through local thrift shops or UsedEverywhere, there are often bits of furniture that are almost cool, but are sometimes in really bad shape, or are really outdated. The trick is learning to use your imagination…and when that fails, piggyback on the imaginations of others by looking up tutorials like this one.
 |
 |
I found our coffee table early in the summer, put out by a garbage bin. I loved it immediately, but took my time deciding what to do with it. I scanned numerous crafty sites, looking for a killer idea, and somewhere out there on the internet, I spied a tutorial on using aluminum foil to faux-gild your furniture. If I ever find the tutorial again, I will give credit where due and post the link…but in truth, I only read it the once, and then didn’t really follow the instructions anyway, surprise surprise. But my advice for the DIY’ers out there is to give yourself some time: don’t rush into a project before you’re certain of what you want to do. Not following this rule can result in a botched project that may cost you a treasure.
 |
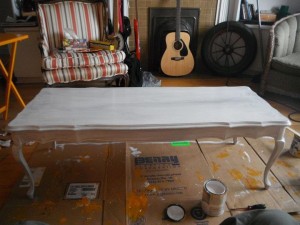 |
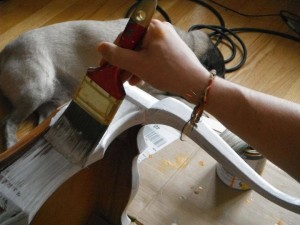
We started off by sanding and priming the table. Primer and paint were the only expenses for this table, as all our other materials were already available around the house, and even then, we had a gift card from our wedding that we used to buy these items. The trick to priming and painting: be sure to let the coats dry. I think we rushed ours, but follow the directions on the back of the can—and if the can doesn’t tell you, the rule of thumb is three days for water-based coats, seven days for oil-based coats. Typically primer (versus paint) needs much less time, but always read to be sure. Paints do something called ‘off-gassing’, and if you rush, you will pull off layers of paint. We rushed on this table, and we ended up having to do three coats instead of two.
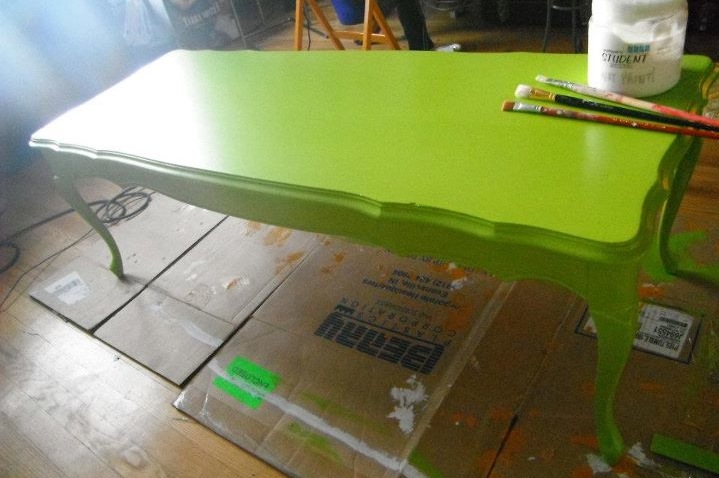
We painted the entire table green, even painting the areas that would eventually be gilded. Why? Because if you miss a tiny spot that ends up showing despite the gilding, it will drive you nuts. You will hate it. You will pick at it. It will haunt you until you either throw out the table, or end up using a three-hair paintbrush trying to get enough paint in there without painting over the gilding work. Trust me: use up a little extra paint and just paint the whole darn table. Once we got our coats of green onto the table, we began the gilding process. For this, you will need:
- Acrylic glaze or gloss medium (we used gloss medium because I have a vat of it left over from a painting I did)
- Soft-bristled brushes—the Wallacks Student brushes are cheap yet very soft. Flat-headed ones are best.
- A roll of aluminum foil
- A lot of time. Rent some movies, this will take a while.
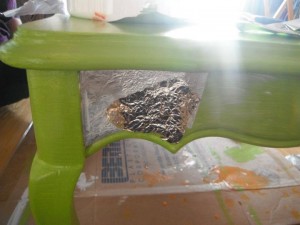 |
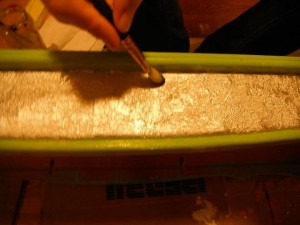 |
- Rip up some foil into pieces that are random shapes and sizes.
- Crinkle them up, then flatten them out. It’s up to you how crinkled you want them.
- Spread a generous coat of glaze onto a small section of the gilding area. Press the foil into the area, then use your finger to rub the foil ‘flat’. (It will never really flatten out, staying crinkly.) We put the dull side facing out, because it was plenty shiny enough.
- Use your brush to coat over the top with more glaze, generously yet not too thick.
- Apply another piece of foil, overlapping slightly. Tear, bend, fold, or crinkle the foil to make it fit around corners or into the space you’ve planned out. Be sure to have some overlap on every piece; it’ll make the look much nicer.
- Keep doing this until you run out of foil, space, or patience. It took us two evenings to finish this part.
Let the glaze dry three days. After three days, you can either use a water-based polyurethane to seal the table. We also did a more difficult secondary technique with dry-brushing to enhance the ‘antiqued’ quality of the foil, so if you’re not already hyperventilating in fear, head over to Project: Priceless—The Nest to find out more.
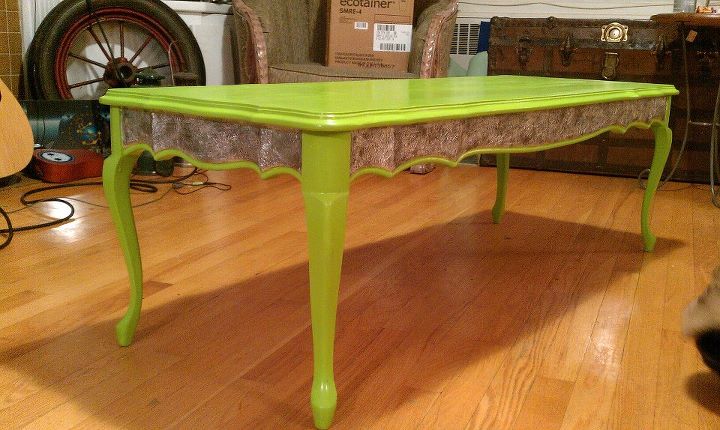
And voila! You have a lovely table/chair/bench/ottoman/whatever else you want to refinish! It’s far more interesting than just stripping and varnishing the wood…though you do have to be ready to paint over your treasured item. Another tip: you will get grief from people for painting solid wood; don’t let it bother you. If the piece was so worn out, ugly, or outdated that it was going to end up in a landfill, there is no value in leaving it wood-coloured! This way, you’ve made the piece something beautiful for you to love, and when it comes time for the next home to love it, they’ll be much less worried about painting it again, themselves. (Also important to note: fake wood laminate furniture requires special primer. Leave a comment, if you want some specific tips.)
The paint and primer cost about $20.00 for this table, with oodles left over for the rest of the house. So, for the cost of a Swedish coffee table made of chip board that will always lean to the left just a bit, we saved a table from the landfill and made ourselves a showstopping treasure for our living room. The green matches perfectly the green of our wedding tablecloths, too…which is awesome, because we kept a couple and are making curtains for the room. It’s so much fun, “Doing-It-Yourself”, and definitely eco-economical. And it’s tons of fun to show off…so the next step is learning to cook so you can serve coffee and cake, and make your friends green with envy.

 Work smart. Not hard.


Shannon
FABULOUS!!!!!
I am an avid DIY chick and am definitely trying this!
Ashley
http://vintagerevivals.blogspot.com/2010/09/tin-foil-nightstand.html
I read your post and thought that this tutorial might have been the one you mentioned? I will definitely be trying this!
Colour Confident: How to Choose Your Decor Shades | UsedEverywhere
[…] be your best friend: primer sticks better to slick surfaces, plus it is toothy, itself. If you’ll recall, I am a big advocate for letting your primer dry: don’t rush layers when you’re painting, or […]