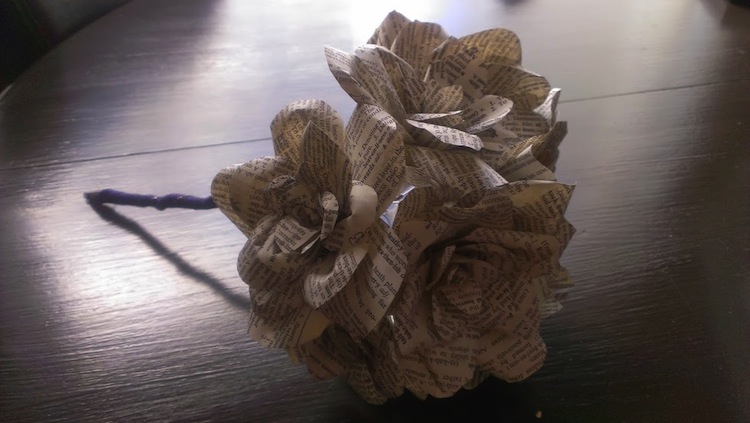
DIY wedding bouquet with vintage paper roses
These beautiful DIY wedding bouquets are an option for vintage lovers and brides trying to budget their wedding.
You needn’t be too crafty to complete this bouquet and our step by step instructional video talks you through every step of the process.
Old books can be found on your local Used.ca site in General Merchandise > Books.
Supplies
- Low heat glue gun
- Wire
- Scissors
- Ribbon
- Vintage paper – you can use an old book or old magazines, whatever fits your theme or takes your fancy
Instructions
- You will need five different sizes of petals for this craft. Cut out your first petal in the shape of an tall arch measuring about 1 inch in height. You will need four petals per size. Increase the size of petals by half an inch each time.
- Pinch the bottom of your paper petal and curl the edges outwards by free hand or by curling it around a skewer.
- Measure 15 inches of wire and cut.
- Cut out a 2 inch arch of vintage paper to use as the centre of your rose. We found our old book on UsedVictoria.com.
- Roll up the paper into a tube and apply glue to one edge.
- Secure to wire, roll up and then apply glue to the other edge.
- Attaching the petals. Begin with the smallest petals. Apply a small drop of glue about a quarter of an inch from the bottom of the petal. Your next petal should overlap the first. As you begin adding larger petals, pinch the bases to secure as they are much wider. Once all your petals are attached, curl the edges out.
- Wrap ribbon around the base and seal with glue.
- Make eight to ten paper roses then bunch together by intertwining the wire. Wrap with ribbon of your choice.
If you have any question about this DIY paper wedding bouquet, please leave a comment for us to answer. We’d love to see your versions of this craft!
Useful links
