Easy craft, pretty gift: teacup towers

So one of the local radio stations has begun 24/7 Christmas music, which means that even though it’s still warm and green here in Ottawa (thanks, climate change), it’s the holiday season and we have to face it. I love this time of year in many ways: amazing baking, sparkly decorations, gatherings, and mocktails. What I hate is the crowded parking lots, malls, and lines everywhere. Last year to avoid all of this, my then-fiancee (now-hubby) Brian and I made as many of our gifts as possible. This year because we’re moving, we won’t be able to do that, but we will, where possible, reduce our shopping list by making things with our own four hands. Here’s a fantastic and easy craft for those of you looking for something inexpensive and awesome to give to your loved ones: tea cup tea trays.
YOU WILL NEED:
1-3 tea cups
1-3 saucers, or alternatively, 1 dinner plate, 1 side plate, and 1 saucer
E-6000 glue
Windex and paper towel
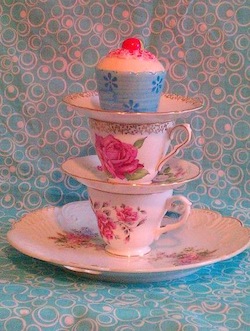
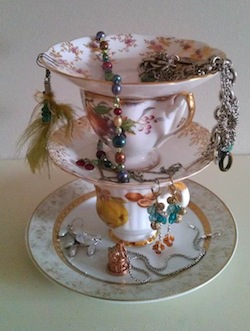
I made these babies for our co-ed wedding shower, and used them again at the wedding itself. I now have about 8 of these, and I’ll be gifting some of them this Christmas; others, I’m selling on UsedOttawa just because I have way too many. At our shower, we used them as cupcake stands for mini cupcakes; at our wedding, we had them out for cookies to sit on. Now I have one in my bedroom and I drape my jewellery all over it. It’s turning out to be one of my prettiest and most versatile craft creations ever.
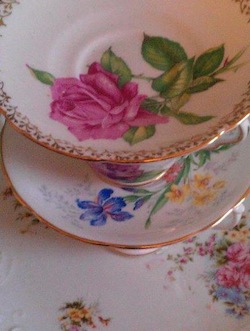
 stack your pretty china |
 use glue. love the glue. |
INSTRUCTIONS:
1. Clean the cups and trays with the Windex so there are no body oils or scudge on them. Pay particular attention to the bottom of the tea cups.
2. Pull out your E-6000 glue. This glue is used widely in craft tutorials across the interweb, whenever a solid seal is needed. I didn’t understand how good this glue could be, until I got some for myself. Use the glue. Love the glue. It is your best friend. (Warning: it is a bit smelly, so ventilate the room.)
3. Practice stacking your plates and cups ‘til you like the way it looks. I tried a bunch of different ways, but usually you put the largest plate on the bottom and work your way up…if all your plates are saucers, it’s not so much of an issue. Sometimes the tea cup handles will get in the way if they rise above the lip of the cup; you may just need to try a different saucer on top, or you may need to try a different teacup.
TIP 1: Do not make your tower taller than three tea cups. I did all of ours with only two tea cups to be sure they were solid, sturdy, and not too easy to topple.
4. Put glue on the underside of the first tea cup (lots of it) and stamp it down onto the plate. You can clean the excess away now, or wait til the glue hardens and use a scalpel—it’s a bit like rubber.
5. Put glue on the rim of the tea cup and now place your next saucer/plate onto the tea cup.
6. Repeat for as many layers as you like.
7. Allow the glue to dry over night before attempting to lift the structure. But afterwards, do indeed lift it and give a gentle shake to be sure everything is secure. Out of all those teacup towers, I only had one plate let go, and I think I just didn’t use enough glue.
 lovely cupcake stand |
 store your bits & bobs |
TIP 2: Be sure to remove any goopy excess dried glue. It’s ugly, and technically it’s not healthy if you do put food on your tray. These babies should definitely be gently washed by hand; as we only had icing get on them, I just wiped them down with a soapy water-soaked cloth, then rinsed them.
This is such a simple craft, and all you need is old china and glue. How awesome is that?! Think about it: one trip to the craft store for glue, plus one search on your local UsedEverywhere site for old china, and you’re done. Hardly a line, parking lot, or shameful mall foodcourt lunch to worry about.
Kelly
This is a great idea. I can see my daughter doing this one for her friends. So simple and so pretty!