Instagram DIY: photo transfer
The world is a happier place because of Instagram. It is just so fun! Choosing from all those filters, creating that perfect retro feel and discovering that you always look great in Mayfair – I can’t get enough.
My phone on the other hand has had enough. Overflowing with Instagram images my phone is constantly requesting more capacity. For the love of Instagram and all my cool photos, I need to get them off the app and on to something that will flaunt their awesomeness.
Have you ever thought about crafting with your Instagram photos?
There are some great DIY projects for your photos that make creative use of repurposed and reclaimed objects. Scour your local Used.ca site for some inspirational finds. Here are some crafts I discovered:
Photos transferred on to a piece of furniture
Reversible Instagram tile coasters
I’ve always wanted to give photo transferring a try. So, I thought I would combine this crafty curiosity and my obsession with Instagram to create something one of a kind. You can transfer a photo onto pretty much anything, but wood just seems like the perfect fit. Check your local Used.ca site for scrap pieces of wood.
I decided to work with some photos I took while on vacation in California. The beach, sun, blue sky and surfer style are the ultimate backdrop for an Instagram photo. I love the worn out vintage effect this project resulted in and I can’t wait to make more!
This DIY is super easy. The hardest part was choosing which photos to use.
Materials:
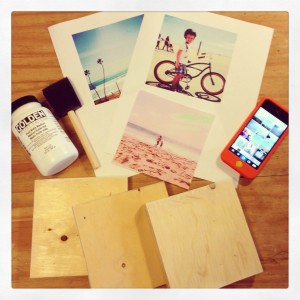
- Square pieces of wood (I made mine 5”x5”)
- Foam brush
- Photos or Instagram images
- Fluid matte medium (can be found at any art store)
- Credit card or other flat edged item
- Fine grit sand paper
- Picture hanging kit
STEP 1: Resize your images to the same size as your wood (or a little smaller to create and centre on the wood). If you have any words in your photo, print the image in reverse, so that it will read correctly when transferred to the wood.
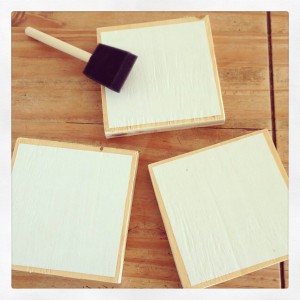
STEP 2: Apply the fluid matte medium with the foam brush to the piece of wood and onto the photo (cover the actual picture).
STEP 3: Carefully lay the image onto the piece of wood right side down. Smooth out any bubbles using the edge of a ruler or a credit card.
STEP 4: Apply more matte medium to the back of the image. Set aside to dry for 12-24 hours.
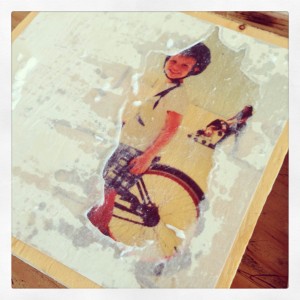
STEP 5: Using a wet textured cloth (I used an old towel) carefully rub the back of the image until it starts peeling away. Once the backing is completely off gently give the image a light sand to create a worn effect. This will help blend in any imperfections.
STEP 6: Attach picture hanging hardware to the back of each piece of wood and hang (or simply lean against a wall on a shelf).
I am now addicted to Instagram and transferring Instagram pictures to wood! I think these would make for a great Christmas gift too.
Useful links
You can often find scrap wood perfect for crafting in the Free category of your local Used.ca site.


 Work smart. Not hard.




Brooke Takhar
So fun! I would probably glue myself to the wood, but, still, worth a try!
Amber R Bosma
Great Christmas gifts don’t you think Brooke?
Amber
Lisa C
Great idea! Did you use photo paper or regular paper? Was it on an inkjet or a laser printer?
Laura Grady
Hi Lisa. I just used regular paper and my ink jet printer. So easy!
raquel
Same questions as above.. what kind of paper was this printed on and was it inkjet or laser?
Laura Grady
Hello, I simply printed on regular paper I use for my inkjet printer. Super easy!
Junior
Was this an inkjet or laserjet print?
Junior
lol! I should have read the comments before posting.
raquel
is fluid matte medium the same ting as mod podge?
Laura Grady
Hi Raquel,
The difference between Mod Podge and Acrylic Sealer (matte medium) is that Mod Podge is thinned white glue. And acrylic sealer is a durable acrylic finish. You can give it a try, but I would stick with the fluid matte medium for this project. Easier to work with and creates a nice transfer.
raquel
*thing